Category: Garden & Outdoors

Gardening, landscaping, plants, patios, lawns, and outdoor living.

  • Can I Design My Own Garden? Yes, and Here Is How (KDAGardenation Guide)

    Can I Design My Own Garden? Yes, and Here Is How (KDAGardenation Guide)

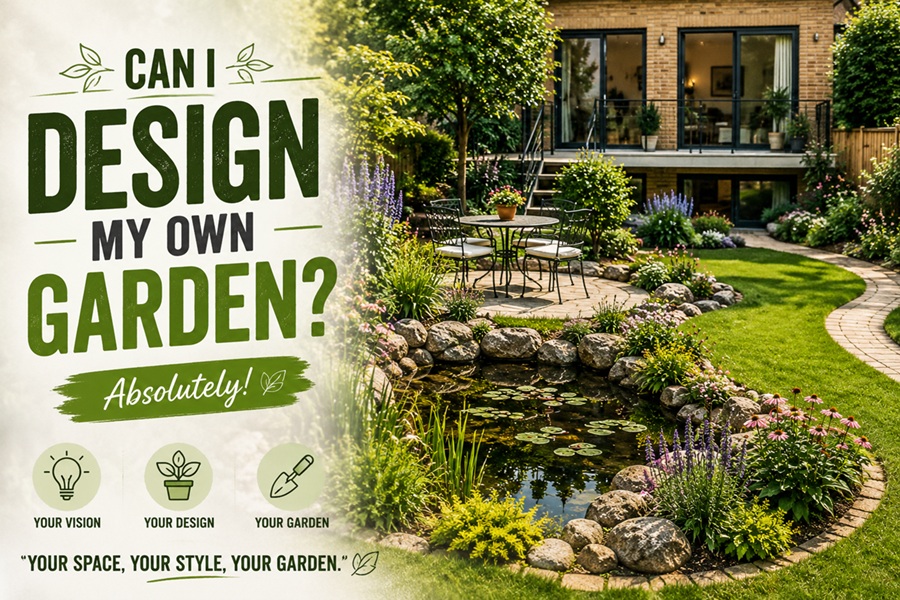
    Yes, you can absolutely design your own garden. You do not need a landscape architect or a big budget. With some careful observation, a simple plan, and attention to sunlight, soil, and how you actually use your outdoor space, anyone can create a garden that looks good and works well. That practical, do-it-yourself spirit is the heart of the KDAGardenation approach to garden design.

    The trick is to stop thinking you need to copy a luxury landscape from a magazine. A great garden is not about spending the most money, it is about building something suited to your home, your climate, and your daily life. Start by watching your space, make a rough plan, and grow it in stages. This guide walks you through exactly how to design a garden you will enjoy for years.

    Designing Your Own Garden: Quick Facts
    Can you DIY it? Yes, no professional required
    First step Observe how sun and shade move across your yard
    Key factors Sunlight, soil, spacing, movement, structure
    Design tools Pencil and paper, or a free garden planning app
    Golden rule Design around your life, not trend photos
    Beginner tip Start small and repeat plants for a clean look
    Smart layout Group plants by use and water needs

    First, Observe Your Space

    Before buying a single plant, walk your yard and pay attention. This costs nothing and saves you from expensive mistakes. Direction matters more than decoration, so notice where the sun lands and where shade lingers.

    Check the yard in the morning and again in the afternoon, because light shifts through the day and across seasons. A south-facing area usually gets strong sun, which suits vegetables and sun-loving flowers. Shadier corners call for plants that tolerate lower light. Understanding this pattern first is the foundation of every good design.

    Understand Sun, Soil, and Water

    Three natural factors quietly decide what will thrive. Get to know them and your plant choices become obvious rather than guesswork.

    • Sunlight: track which areas get full sun, partial shade, or deep shade
    • Soil: notice whether your ground is sandy, heavy clay, or rich and loose, since it affects drainage and growth
    • Water: treat water as limited, and plan so plants with similar needs sit together

    Matching plants to these conditions is what keeps a garden healthy and low-stress. Fighting your natural conditions, on the other hand, means constant watering, replacing dead plants, and frustration.

    Plan Your Layout in Zones

    A strong garden is organized into zones, which simply means grouping areas by purpose. Zoning keeps the space efficient and easy to care for, and it makes even a modest yard feel intentional.

    Zone idea Where to place it Why
    Herbs Near the kitchen door Quick to grab while cooking
    Frequently picked veggies Close to the house Easy daily harvesting
    Low-maintenance shrubs Outer edges Little care needed far from the house
    Seating or relaxing area A sheltered, pleasant spot A place to actually enjoy the garden

    Connect these zones with clear paths. Make walkways wide enough to move through comfortably, and if you use a wheelbarrow, test that it fits before you finalize anything. Good structure is what separates a garden that feels calm from one that feels cramped.

    Sketch It Out

    You do not need fancy software. A pencil, paper, and a rough outline of your yard are enough to start. Draw the fixed features first: the house, existing trees, fences, and any structures. Then mark your sun and shade zones.

    From there, block in your zones and rough plant placements. Seeing it on paper helps you catch problems, like a tall plant that would shade a sunny bed, before they cost you time and money. Free garden planning apps can help too, but simple sketches work perfectly well.

    Choosing Plants Without Overwhelm

    The plant aisle can be paralyzing, so give yourself boundaries. Narrowing your choices actually makes design easier and the result more cohesive.

    • Match every plant to your site’s sun, soil, and moisture
    • Decide what each plant is for: privacy, structure, ground cover, or color
    • Limit your color palette to around three colors for a pulled-together look
    • Repeat the same plants in groups to create rhythm and a clean appearance
    • Place fast growers where they will not smother slower neighbors

    Structure and Finishing Touches

    Beyond plants, a few structural elements pull a garden together. Strong borders between the lawn and beds keep everything looking crisp. Ground covers fill bare spots and limit weeds. Raised beds reduce bending and make care easier over time.

    Paths give the garden a sense of order and invite you to move through it. Even simple gravel or stepping stones make a space feel finished. These details are what make a self-designed garden look like it was professionally planned.

    Start Small and Grow

    One of the biggest reasons people give up is trying to do everything at once. You do not have to. Designing a garden is an ongoing process, not a single weekend event. Start with one bed or one zone, learn what works in your conditions, and expand from there.

    Keep observing even after planting. A garden changes every season, and small adjustments each year are normal and expected. Take inspiration from professional designs, but always shape them around your own soil, climate, and lifestyle. With patience and a practical mindset, the answer to can I design my own garden is a confident yes.

    Which Direction Should Your Garden Face?

    Orientation is one of those quiet factors that shapes results more than most beginners expect. Because the sun moves across the sky, the way your garden faces decides how much light different areas receive.

    South-facing spaces tend to get the strongest, longest sun, making them ideal for vegetables and flowering plants that crave warmth. North-facing areas stay shadier and suit plants that tolerate lower light. When you arrange beds, place taller plants where they will not cast shade over shorter, sun-hungry ones as the season progresses. Working with your garden’s natural aspect, rather than against it, saves endless frustration later.

    Budget-Friendly Ways to Start

    Designing your own garden does not have to drain your wallet. Some of the smartest moves cost little or nothing, and they often produce the calmest, most cohesive spaces.

    • Choose fewer plant varieties and repeat them for a clean, unified look
    • Grow from seed where you can, which is far cheaper than buying mature plants
    • Split and replant perennials you already have to fill new areas for free
    • Use ground covers to limit weeds and reduce the need for mulch
    • Reuse materials like stones or salvaged wood for borders and paths

    Do Not Overlook Curb Appeal

    A well-designed garden does more than please you, it shapes the first impression your whole home makes. Clean walkways, healthy plants, and tidy borders signal a cared-for property and lift the look of the entire house. You do not need dramatic front-yard landscaping to achieve it.

    Simple, consistent touches carry the most weight. Keep beds neat, repeat a few reliable plants for a cohesive look, and maintain clear edges between lawn and planting areas. A calm, well-kept garden reads as intentional and inviting, which is exactly the effect a thoughtful DIY design should deliver.

    Common Mistakes to Avoid

    • Buying plants before checking your sun and soil conditions
    • Cramming in too many different varieties, which looks chaotic and is hard to maintain
    • Ignoring how you actually move through the space, leaving paths too narrow
    • Overspending on features that add work without adding value
    • Trying to finish the entire garden in one go instead of building in stages

    Frequently Asked Questions

    Can a beginner design their own garden?

    Yes. By observing sunlight and soil, planning in zones, and starting small, beginners can design a functional, attractive garden without hiring a professional.

    What should I do first when designing a garden?

    Observe your space. Track where the sun and shade fall throughout the day, and note your soil type. These natural conditions guide every other decision.

    How do I choose the right plants?

    Match plants to your site’s sun, soil, and water, decide what role each plays, and limit your palette. Repeating plants in groups creates a clean, cohesive look.

    Do I need special software to plan a garden?

    No. A pencil and paper sketch of your yard works well. Free garden planning apps are optional extras, not requirements.

    How do I keep my garden low-maintenance?

    Choose fewer plant varieties, repeat them, use ground covers to block weeds, add strong borders, and group plants by water needs so care stays simple.

  • How to Keep Deer Out of the Garden: Methods That Actually Work

    How to Keep Deer Out of the Garden: Methods That Actually Work

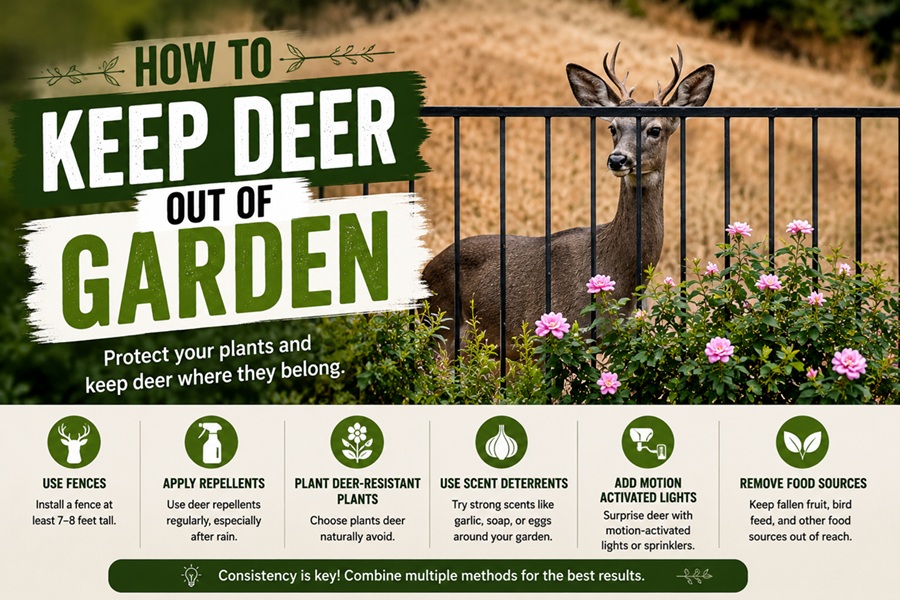
    The single most reliable way to keep deer out of a garden is a physical barrier: an 8-foot fence, a solid or stockade fence at least 6 feet tall, or a double fence that plays on a deer’s poor depth perception. Everything else, including repellent sprays, deer-resistant plants, and motion-activated sprinklers, genuinely helps, but those methods work best layered together rather than relied on alone. Deer are persistent, and no single trick holds them off forever.

    Here is why this matters. A single deer can eat around ten pounds of plants in a day, and once a herd learns your yard is an easy meal, they return night after night along the same route. White-tailed deer are creatures of habit, so stopping the damage early is far easier than breaking the pattern later. This guide covers the methods that hold up in practice and flags the popular ones that do not.

    Keeping Deer Out: Quick Facts
    Most reliable method A tall physical fence
    Recommended fence height 8 feet for standard fencing
    Deer jump ability Up to about 6 feet vertically, 30 feet horizontally
    Solid fence option 6 feet works, since deer avoid jumping what they cannot see
    Best repellents Egg-based sprays, reapplied after rain
    Deer-resistant plants Lavender, catmint, daffodils, ferns, coneflower
    Deer favorites to protect Hostas, tulips, roses, daylilies, azaleas
    Golden rule Combine several methods for best results

    Fencing: The Only Near-Guaranteed Fix

    If you want to actually stop deer rather than just discourage them, fencing is the answer. The catch is that deer are impressive jumpers, clearing roughly six feet vertically and covering long distances horizontally, so height and design both matter.

    Tall standard fence. A sturdy mesh or wire fence of about 8 feet is the gold standard. It is tall enough that most deer will not attempt the jump. In wooded settings, black polypropylene deer netting is nearly invisible against the trees and easier to install than it looks.

    Solid or stockade fence. Here is a useful trick: deer hesitate to jump over something when they cannot see the landing. That means a solid fence only needs to be around 6 feet, since the deer cannot judge what is on the other side. Privacy fences double as effective deer barriers for this reason.

    Double fence. If you would rather not build one very tall fence, two shorter fences work through the same weakness. Set two 4 to 5 foot fences a few feet apart. Deer have poor depth perception and will not jump into the narrow, confusing gap between them. Closely spaced raised beds near a fence can create a similar effect.

    Repellents: Helpful, But Keep Reapplying

    Scent and taste repellents are a solid second layer, especially for protecting specific plants. The most effective options are egg-based sprays, which several studies back up. They smell strongly of rotten eggs when fresh, which is exactly what sends deer looking elsewhere.

    The key with any repellent is consistency. Reapply after heavy rain or dew, and rotate between products so deer do not grow used to a single scent. Start spraying in early spring as plants bud out, and cover new growth as it appears. Spraying from the ground up to about six feet catches the range deer browse.

    Deer-Resistant Plants: Design Them Out

    You can make your garden less tempting by choosing plants deer tend to skip. No plant is completely deer-proof when animals are hungry enough, especially in winter, but strong-smelling herbs, fuzzy leaves, and toxic varieties are usually passed over.

    Deer tend to avoid Deer love (protect these)
    Lavender and catmint Hostas
    Daffodils Tulips
    Ferns Roses
    Coneflower and columbine Daylilies
    Rosemary and ornamental grasses Azaleas and berries

    A smart tactic is plant blocking. Surround a deer favorite with a border of plants they dislike, packed closely enough to form a low hedge. Faced with an unappealing wall of lavender or ferns, deer often move on to easier food. Keeping their favorite plants close to the house also lets you watch for damage sooner.

    Motion Deterrents and Scent Scares

    Motion-activated sprinklers are surprisingly effective at entry points. A sudden burst of water startles deer, and because they are wary animals, that unpleasant surprise can steer them away from a regular route. Place them where deer enter the yard for the biggest impact.

    Predator scent is another option. Coyote or wolf urine applied to stakes around the perimeter triggers a deer’s threat response. Like sprays, it needs reapplying every couple of weeks and after rain, and it works best rotated with other methods. One note: predator scents can stress outdoor cats, so use them thoughtfully.

    Popular Tricks That Do Not Hold Up

    Plenty of clever-sounding hacks circulate online, but many fail once deer get comfortable. Save your effort and skip relying on these alone.

    • Bars of soap hung from branches
    • Bags of human hair
    • Fishing line strung at deer height

    These might spook a cautious deer briefly, but hungry, habituated deer push right past them. Treat them as minor extras at best, not a real defense.

    The Winning Approach: Layer Your Defenses

    The gardeners who keep deer out most reliably do not pick one method. They stack several. A common winning combination looks like this: a tall or solid fence as the backbone, egg-based repellent sprayed every couple of weeks, deer-resistant plants around the borders, and a motion-activated sprinkler at the main entry point.

    Because deer are creatures of habit, breaking their routine with multiple obstacles convinces them your yard is more trouble than it is worth. Consistency is what makes the whole strategy stick.

    Understand Deer Behavior First

    Beating deer is easier once you understand how they think. They are cautious, habitual animals that follow established feeding routes and return to reliable food sources night after night. A single easy meal in your yard can create a pattern that lasts for years.

    They are most active at dawn and dusk, though hungry deer will feed at any hour, especially when winter thins their natural food. This is why acting early matters so much. Stopping deer before they mark your garden as a regular stop is far simpler than convincing an established herd to abandon a route they already trust.

    Adjust Your Defense by Season

    Deer pressure changes through the year, and your approach can flex with it. Spring is when tender new growth appears and repellent routines should begin, right as plants bud out. Summer brings steady browsing, so fencing and consistent spraying carry the load.

    The hardest season is winter, when natural food is scarce and deer grow bold enough to eat plants they would normally ignore. During those lean months, physical barriers become even more important, since no repellent or unpalatable plant fully stops a starving animal. Planning for that seasonal swing keeps your garden protected year-round.

    Protecting High-Value Plants One by One

    Sometimes you cannot fence an entire yard, but you still want to shield a few prized plants. Individual protection is a practical middle ground. Wire cages or mesh cylinders placed around specific shrubs, young trees, or standout perennials keep deer from reaching them while blending into the landscape.

    This approach works well for expensive or slow-growing plants you cannot afford to lose. Pair a few targeted cages with border planting and repellents, and you can protect the pieces that matter most without the cost and effort of enclosing the whole property.

    Frequently Asked Questions

    What is the best way to keep deer out of a garden?

    A tall physical fence is the most reliable method, ideally 8 feet, or a solid fence around 6 feet since deer avoid jumping what they cannot see over. Layering in repellents and deer-resistant plants strengthens the defense.

    How high can deer jump?

    Deer can clear roughly 6 feet vertically and cover long horizontal distances, which is why an 8-foot fence is recommended for standard designs.

    Do deer repellents really work?

    Yes, especially egg-based sprays, but only with consistent use. Reapply after rain and rotate products so deer do not get used to one scent.

    What plants keep deer away?

    Strong-smelling and toxic plants like lavender, catmint, rosemary, daffodils, and ferns are usually avoided. No plant is fully deer-proof when animals are very hungry.

    Do soap bars and hanging hair keep deer out?

    Not reliably. These popular tricks may briefly deter a nervous deer, but hungry, habituated deer ignore them. They should not be your main line of defense.

  • How to Build a Raised Garden Bed: A Simple Step-by-Step Guide

    How to Build a Raised Garden Bed: A Simple Step-by-Step Guide

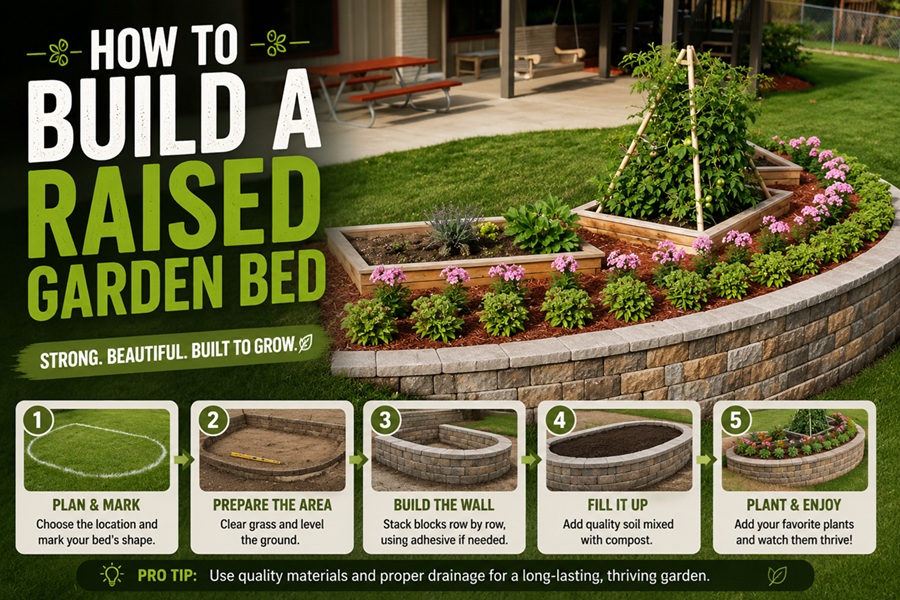
    To build a raised garden bed, construct a simple rectangular frame, most commonly 4 feet by 8 feet and 12 to 18 inches deep, out of rot-resistant wood such as cedar. Set it in a spot that gets six to eight hours of sun, line the base to block weeds and burrowing pests, and fill it with a mix of roughly half quality topsoil and half compost. That is the whole project in one breath, and most people can finish it in an afternoon.

    Raised beds are popular for good reason. They give you control over the soil, drain better than heavy clay ground, warm up earlier in spring, and save your back by lifting the garden closer to you. Below is a clear walkthrough covering the size, the wood, the tools, and the build, so you end up with a sturdy bed that lasts for years rather than one that rots out after a season or two.

    Raised Garden Bed: Quick Facts
    Common size 4 feet by 8 feet
    Maximum width 4 feet, so you can reach the center from either side
    Ideal depth 12 to 18 inches for most vegetables
    Best wood Cedar or redwood, naturally rot resistant
    Wood to avoid for edibles Pressure-treated lumber, due to chemical concerns
    Soil mix About half topsoil and half compost
    Sunlight needed 6 to 8 hours per day
    Skill level Beginner friendly
    Build time A few hours

    Why Build a Raised Bed at All?

    Before you pick up a drill, it helps to know what you are gaining. Raised beds solve several common gardening headaches at once.

    • You control the soil, so poor, sandy, or clay-heavy ground stops being a problem
    • Drainage improves, which lowers the risk of root rot
    • Fewer weeds creep in, since you start with fresh, clean soil
    • The soil warms earlier in spring, stretching your growing season
    • Less bending and kneeling makes the whole hobby easier on your body

    Choosing the Right Size

    Length is flexible, but width has a hard rule. Keep the bed no wider than about 4 feet so you can comfortably reach the middle from either side without stepping into it. Stepping on the soil compacts it, which is exactly what a raised bed is meant to avoid.

    A 4 by 8 foot bed is the classic choice because it fits standard lumber lengths and gives plenty of growing room. If you are short on space, a 4 by 4 bed works well and costs less. For depth, 12 inches suits most crops, and 18 inches gives deep-rooted vegetables like carrots and tomatoes room to stretch.

    Picking the Best Wood

    Wood choice decides how long your bed survives the weather. Damp soil sits against these boards year-round, so rot resistance matters.

    Wood type Lifespan Notes
    Cedar Long Naturally rot resistant, a top pick
    Redwood Long Durable and attractive, often pricier
    Pine or fir Shorter Cheap and easy to find, but rots faster
    Pressure-treated Long Best avoided for growing food

    Cedar and redwood are the favorites because they hold up for years without chemicals. Pine and fir cost less and are fine for a starter bed, though they will not last as long. Many gardeners skip pressure-treated lumber for vegetable beds, since the concern is that treatment chemicals could migrate into the soil where you grow food. If you do use pine, lining the inside walls with heavy plastic can extend its life.

    Tools and Materials You Will Need

    Gather everything before you start so the build goes smoothly. The list is short and forgiving.

    • Rot-resistant boards for the sides, cut to your chosen length
    • A few short pieces or 4 by 4 posts for the inside corners
    • Exterior-grade deck screws
    • A drill or driver and a saw, or have the store cut the wood for you
    • Hardware cloth for the base to block gophers and moles
    • Cardboard or landscape fabric to smother weeds underneath
    • Topsoil and compost to fill the bed

    Step-by-Step Build

    Here is the straightforward sequence. Take your time squaring the corners and the rest falls into place.

    Step 1: Prepare the spot. Pick a level, sunny location with six to eight hours of light. Clear the grass or weeds where the bed will sit, and make sure the ground is roughly flat so the frame does not wobble.

    Step 2: Assemble the frame. Arrange your four boards into a rectangle so the ends meet at the corners. At each corner, predrill holes to keep the wood from splitting, then drive deck screws through both boards. Adding a short corner post on the inside gives the joints extra strength.

    Step 3: Level and position. Set the finished frame onto the prepared spot. Check that it sits roughly level, adjusting by digging out a little soil or propping up a low corner. It does not need to be perfect, just close.

    Step 4: Line the base. Lay hardware cloth across the bottom if burrowing pests are a concern, then add a layer of cardboard or landscape fabric to block weeds from growing up into your soil. If the bed sits on open ground, leave the bottom otherwise open so it drains and roots can reach down.

    Step 5: Fill with soil. Fill the bed with a blend of about half quality topsoil and half compost. Skip the old advice about a gravel layer at the bottom, since it does not actually improve drainage. Rake the surface smooth and you are ready to plant.

    Filling and Feeding the Soil

    The soil is where your garden succeeds or struggles, so do not cut corners here. A rich, loose mix of topsoil and compost gives roots room to grow and plenty of nutrients. Each following season, top the bed with an inch or two of fresh compost as a mulch. This feeds the soil, holds moisture, and keeps weeds down without you having to dig everything out and start over.

    Where to Place Your Raised Bed

    Location can make or break your results, so choose the spot with care. Sunlight is the top priority, since most vegetables need six to eight hours of direct light to produce well. Watch your yard through the day and pick the brightest available area.

    Beyond sun, think about convenience and water. A bed close to the house and a water source is one you will actually tend, while a bed tucked in a far corner tends to get neglected. Avoid low spots where water pools, and keep the bed away from large tree roots that will compete with your plants for water and nutrients.

    Easy Crops for a First Raised Bed

    If you are new to growing, start with forgiving plants that reward you quickly. Early success builds confidence and keeps the hobby fun.

    • Lettuce and salad greens, which grow fast in shallow soil
    • Herbs like basil, parsley, and mint for the kitchen
    • Radishes, which are ready in just a few weeks
    • Bush beans, which are productive and low fuss
    • Tomatoes and peppers for a deeper bed with plenty of sun

    A Few Tips for Success

    • Position longer beds so tall plants do not shade shorter ones as the season goes on
    • Water deeply and less often to encourage strong, deep roots
    • Add a trellis to one end for climbing crops like beans, peas, and cucumbers
    • Group plants with similar water and sun needs together
    • Refresh the soil with compost every year to keep it productive

    Frequently Asked Questions

    How deep should a raised garden bed be?

    For most vegetables, 12 inches is enough, and 18 inches is better for deep-rooted crops like carrots and tomatoes. Over concrete or very poor ground, go deeper.

    What is the best wood for a raised bed?

    Cedar and redwood last longest because they naturally resist rot. Pine and fir are cheaper but shorter-lived. Many gardeners avoid pressure-treated lumber for beds used to grow food.

    What soil should I fill it with?

    A mix of roughly half quality topsoil and half compost works well. Skip the gravel layer at the bottom, as it does not help drainage.

    How wide should a raised bed be?

    No more than about 4 feet, so you can reach the center from either side without stepping on and compacting the soil.

    Does a raised bed need a bottom?

    Not if it sits on open soil. Leaving it open lets the bed drain and lets roots reach down. Hardware cloth across the base helps keep out burrowing pests.