
Author: admin

  • Can I Design My Own Garden? Yes, and Here Is How (KDAGardenation Guide)

    Can I Design My Own Garden? Yes, and Here Is How (KDAGardenation Guide)

    Yes, you can absolutely design your own garden. You do not need a landscape architect or a big budget. With some careful observation, a simple plan, and attention to sunlight, soil, and how you actually use your outdoor space, anyone can create a garden that looks good and works well. That practical, do-it-yourself spirit is the heart of the KDAGardenation approach to garden design.

    The trick is to stop thinking you need to copy a luxury landscape from a magazine. A great garden is not about spending the most money, it is about building something suited to your home, your climate, and your daily life. Start by watching your space, make a rough plan, and grow it in stages. This guide walks you through exactly how to design a garden you will enjoy for years.

    Designing Your Own Garden: Quick Facts
    Can you DIY it? Yes, no professional required
    First step Observe how sun and shade move across your yard
    Key factors Sunlight, soil, spacing, movement, structure
    Design tools Pencil and paper, or a free garden planning app
    Golden rule Design around your life, not trend photos
    Beginner tip Start small and repeat plants for a clean look
    Smart layout Group plants by use and water needs

    First, Observe Your Space

    Before buying a single plant, walk your yard and pay attention. This costs nothing and saves you from expensive mistakes. Direction matters more than decoration, so notice where the sun lands and where shade lingers.

    Check the yard in the morning and again in the afternoon, because light shifts through the day and across seasons. A south-facing area usually gets strong sun, which suits vegetables and sun-loving flowers. Shadier corners call for plants that tolerate lower light. Understanding this pattern first is the foundation of every good design.

    Understand Sun, Soil, and Water

    Three natural factors quietly decide what will thrive. Get to know them and your plant choices become obvious rather than guesswork.

    • Sunlight: track which areas get full sun, partial shade, or deep shade
    • Soil: notice whether your ground is sandy, heavy clay, or rich and loose, since it affects drainage and growth
    • Water: treat water as limited, and plan so plants with similar needs sit together

    Matching plants to these conditions is what keeps a garden healthy and low-stress. Fighting your natural conditions, on the other hand, means constant watering, replacing dead plants, and frustration.

    Plan Your Layout in Zones

    A strong garden is organized into zones, which simply means grouping areas by purpose. Zoning keeps the space efficient and easy to care for, and it makes even a modest yard feel intentional.

    Zone idea Where to place it Why
    Herbs Near the kitchen door Quick to grab while cooking
    Frequently picked veggies Close to the house Easy daily harvesting
    Low-maintenance shrubs Outer edges Little care needed far from the house
    Seating or relaxing area A sheltered, pleasant spot A place to actually enjoy the garden

    Connect these zones with clear paths. Make walkways wide enough to move through comfortably, and if you use a wheelbarrow, test that it fits before you finalize anything. Good structure is what separates a garden that feels calm from one that feels cramped.

    Sketch It Out

    You do not need fancy software. A pencil, paper, and a rough outline of your yard are enough to start. Draw the fixed features first: the house, existing trees, fences, and any structures. Then mark your sun and shade zones.

    From there, block in your zones and rough plant placements. Seeing it on paper helps you catch problems, like a tall plant that would shade a sunny bed, before they cost you time and money. Free garden planning apps can help too, but simple sketches work perfectly well.

    Choosing Plants Without Overwhelm

    The plant aisle can be paralyzing, so give yourself boundaries. Narrowing your choices actually makes design easier and the result more cohesive.

    • Match every plant to your site’s sun, soil, and moisture
    • Decide what each plant is for: privacy, structure, ground cover, or color
    • Limit your color palette to around three colors for a pulled-together look
    • Repeat the same plants in groups to create rhythm and a clean appearance
    • Place fast growers where they will not smother slower neighbors

    Structure and Finishing Touches

    Beyond plants, a few structural elements pull a garden together. Strong borders between the lawn and beds keep everything looking crisp. Ground covers fill bare spots and limit weeds. Raised beds reduce bending and make care easier over time.

    Paths give the garden a sense of order and invite you to move through it. Even simple gravel or stepping stones make a space feel finished. These details are what make a self-designed garden look like it was professionally planned.

    Start Small and Grow

    One of the biggest reasons people give up is trying to do everything at once. You do not have to. Designing a garden is an ongoing process, not a single weekend event. Start with one bed or one zone, learn what works in your conditions, and expand from there.

    Keep observing even after planting. A garden changes every season, and small adjustments each year are normal and expected. Take inspiration from professional designs, but always shape them around your own soil, climate, and lifestyle. With patience and a practical mindset, the answer to can I design my own garden is a confident yes.

    Which Direction Should Your Garden Face?

    Orientation is one of those quiet factors that shapes results more than most beginners expect. Because the sun moves across the sky, the way your garden faces decides how much light different areas receive.

    South-facing spaces tend to get the strongest, longest sun, making them ideal for vegetables and flowering plants that crave warmth. North-facing areas stay shadier and suit plants that tolerate lower light. When you arrange beds, place taller plants where they will not cast shade over shorter, sun-hungry ones as the season progresses. Working with your garden’s natural aspect, rather than against it, saves endless frustration later.

    Budget-Friendly Ways to Start

    Designing your own garden does not have to drain your wallet. Some of the smartest moves cost little or nothing, and they often produce the calmest, most cohesive spaces.

    • Choose fewer plant varieties and repeat them for a clean, unified look
    • Grow from seed where you can, which is far cheaper than buying mature plants
    • Split and replant perennials you already have to fill new areas for free
    • Use ground covers to limit weeds and reduce the need for mulch
    • Reuse materials like stones or salvaged wood for borders and paths

    Do Not Overlook Curb Appeal

    A well-designed garden does more than please you, it shapes the first impression your whole home makes. Clean walkways, healthy plants, and tidy borders signal a cared-for property and lift the look of the entire house. You do not need dramatic front-yard landscaping to achieve it.

    Simple, consistent touches carry the most weight. Keep beds neat, repeat a few reliable plants for a cohesive look, and maintain clear edges between lawn and planting areas. A calm, well-kept garden reads as intentional and inviting, which is exactly the effect a thoughtful DIY design should deliver.

    Common Mistakes to Avoid

    • Buying plants before checking your sun and soil conditions
    • Cramming in too many different varieties, which looks chaotic and is hard to maintain
    • Ignoring how you actually move through the space, leaving paths too narrow
    • Overspending on features that add work without adding value
    • Trying to finish the entire garden in one go instead of building in stages

    Frequently Asked Questions

    Can a beginner design their own garden?

    Yes. By observing sunlight and soil, planning in zones, and starting small, beginners can design a functional, attractive garden without hiring a professional.

    What should I do first when designing a garden?

    Observe your space. Track where the sun and shade fall throughout the day, and note your soil type. These natural conditions guide every other decision.

    How do I choose the right plants?

    Match plants to your site’s sun, soil, and water, decide what role each plays, and limit your palette. Repeating plants in groups creates a clean, cohesive look.

    Do I need special software to plan a garden?

    No. A pencil and paper sketch of your yard works well. Free garden planning apps are optional extras, not requirements.

    How do I keep my garden low-maintenance?

    Choose fewer plant varieties, repeat them, use ground covers to block weeds, add strong borders, and group plants by water needs so care stays simple.

  • How to Keep Deer Out of the Garden: Methods That Actually Work

    How to Keep Deer Out of the Garden: Methods That Actually Work

    The single most reliable way to keep deer out of a garden is a physical barrier: an 8-foot fence, a solid or stockade fence at least 6 feet tall, or a double fence that plays on a deer’s poor depth perception. Everything else, including repellent sprays, deer-resistant plants, and motion-activated sprinklers, genuinely helps, but those methods work best layered together rather than relied on alone. Deer are persistent, and no single trick holds them off forever.

    Here is why this matters. A single deer can eat around ten pounds of plants in a day, and once a herd learns your yard is an easy meal, they return night after night along the same route. White-tailed deer are creatures of habit, so stopping the damage early is far easier than breaking the pattern later. This guide covers the methods that hold up in practice and flags the popular ones that do not.

    Keeping Deer Out: Quick Facts
    Most reliable method A tall physical fence
    Recommended fence height 8 feet for standard fencing
    Deer jump ability Up to about 6 feet vertically, 30 feet horizontally
    Solid fence option 6 feet works, since deer avoid jumping what they cannot see
    Best repellents Egg-based sprays, reapplied after rain
    Deer-resistant plants Lavender, catmint, daffodils, ferns, coneflower
    Deer favorites to protect Hostas, tulips, roses, daylilies, azaleas
    Golden rule Combine several methods for best results

    Fencing: The Only Near-Guaranteed Fix

    If you want to actually stop deer rather than just discourage them, fencing is the answer. The catch is that deer are impressive jumpers, clearing roughly six feet vertically and covering long distances horizontally, so height and design both matter.

    Tall standard fence. A sturdy mesh or wire fence of about 8 feet is the gold standard. It is tall enough that most deer will not attempt the jump. In wooded settings, black polypropylene deer netting is nearly invisible against the trees and easier to install than it looks.

    Solid or stockade fence. Here is a useful trick: deer hesitate to jump over something when they cannot see the landing. That means a solid fence only needs to be around 6 feet, since the deer cannot judge what is on the other side. Privacy fences double as effective deer barriers for this reason.

    Double fence. If you would rather not build one very tall fence, two shorter fences work through the same weakness. Set two 4 to 5 foot fences a few feet apart. Deer have poor depth perception and will not jump into the narrow, confusing gap between them. Closely spaced raised beds near a fence can create a similar effect.

    Repellents: Helpful, But Keep Reapplying

    Scent and taste repellents are a solid second layer, especially for protecting specific plants. The most effective options are egg-based sprays, which several studies back up. They smell strongly of rotten eggs when fresh, which is exactly what sends deer looking elsewhere.

    The key with any repellent is consistency. Reapply after heavy rain or dew, and rotate between products so deer do not grow used to a single scent. Start spraying in early spring as plants bud out, and cover new growth as it appears. Spraying from the ground up to about six feet catches the range deer browse.

    Deer-Resistant Plants: Design Them Out

    You can make your garden less tempting by choosing plants deer tend to skip. No plant is completely deer-proof when animals are hungry enough, especially in winter, but strong-smelling herbs, fuzzy leaves, and toxic varieties are usually passed over.

    Deer tend to avoid Deer love (protect these)
    Lavender and catmint Hostas
    Daffodils Tulips
    Ferns Roses
    Coneflower and columbine Daylilies
    Rosemary and ornamental grasses Azaleas and berries

    A smart tactic is plant blocking. Surround a deer favorite with a border of plants they dislike, packed closely enough to form a low hedge. Faced with an unappealing wall of lavender or ferns, deer often move on to easier food. Keeping their favorite plants close to the house also lets you watch for damage sooner.

    Motion Deterrents and Scent Scares

    Motion-activated sprinklers are surprisingly effective at entry points. A sudden burst of water startles deer, and because they are wary animals, that unpleasant surprise can steer them away from a regular route. Place them where deer enter the yard for the biggest impact.

    Predator scent is another option. Coyote or wolf urine applied to stakes around the perimeter triggers a deer’s threat response. Like sprays, it needs reapplying every couple of weeks and after rain, and it works best rotated with other methods. One note: predator scents can stress outdoor cats, so use them thoughtfully.

    Popular Tricks That Do Not Hold Up

    Plenty of clever-sounding hacks circulate online, but many fail once deer get comfortable. Save your effort and skip relying on these alone.

    • Bars of soap hung from branches
    • Bags of human hair
    • Fishing line strung at deer height

    These might spook a cautious deer briefly, but hungry, habituated deer push right past them. Treat them as minor extras at best, not a real defense.

    The Winning Approach: Layer Your Defenses

    The gardeners who keep deer out most reliably do not pick one method. They stack several. A common winning combination looks like this: a tall or solid fence as the backbone, egg-based repellent sprayed every couple of weeks, deer-resistant plants around the borders, and a motion-activated sprinkler at the main entry point.

    Because deer are creatures of habit, breaking their routine with multiple obstacles convinces them your yard is more trouble than it is worth. Consistency is what makes the whole strategy stick.

    Understand Deer Behavior First

    Beating deer is easier once you understand how they think. They are cautious, habitual animals that follow established feeding routes and return to reliable food sources night after night. A single easy meal in your yard can create a pattern that lasts for years.

    They are most active at dawn and dusk, though hungry deer will feed at any hour, especially when winter thins their natural food. This is why acting early matters so much. Stopping deer before they mark your garden as a regular stop is far simpler than convincing an established herd to abandon a route they already trust.

    Adjust Your Defense by Season

    Deer pressure changes through the year, and your approach can flex with it. Spring is when tender new growth appears and repellent routines should begin, right as plants bud out. Summer brings steady browsing, so fencing and consistent spraying carry the load.

    The hardest season is winter, when natural food is scarce and deer grow bold enough to eat plants they would normally ignore. During those lean months, physical barriers become even more important, since no repellent or unpalatable plant fully stops a starving animal. Planning for that seasonal swing keeps your garden protected year-round.

    Protecting High-Value Plants One by One

    Sometimes you cannot fence an entire yard, but you still want to shield a few prized plants. Individual protection is a practical middle ground. Wire cages or mesh cylinders placed around specific shrubs, young trees, or standout perennials keep deer from reaching them while blending into the landscape.

    This approach works well for expensive or slow-growing plants you cannot afford to lose. Pair a few targeted cages with border planting and repellents, and you can protect the pieces that matter most without the cost and effort of enclosing the whole property.

    Frequently Asked Questions

    What is the best way to keep deer out of a garden?

    A tall physical fence is the most reliable method, ideally 8 feet, or a solid fence around 6 feet since deer avoid jumping what they cannot see over. Layering in repellents and deer-resistant plants strengthens the defense.

    How high can deer jump?

    Deer can clear roughly 6 feet vertically and cover long horizontal distances, which is why an 8-foot fence is recommended for standard designs.

    Do deer repellents really work?

    Yes, especially egg-based sprays, but only with consistent use. Reapply after rain and rotate products so deer do not get used to one scent.

    What plants keep deer away?

    Strong-smelling and toxic plants like lavender, catmint, rosemary, daffodils, and ferns are usually avoided. No plant is fully deer-proof when animals are very hungry.

    Do soap bars and hanging hair keep deer out?

    Not reliably. These popular tricks may briefly deter a nervous deer, but hungry, habituated deer ignore them. They should not be your main line of defense.

  • How to Build a Raised Garden Bed: A Simple Step-by-Step Guide

    How to Build a Raised Garden Bed: A Simple Step-by-Step Guide

    To build a raised garden bed, construct a simple rectangular frame, most commonly 4 feet by 8 feet and 12 to 18 inches deep, out of rot-resistant wood such as cedar. Set it in a spot that gets six to eight hours of sun, line the base to block weeds and burrowing pests, and fill it with a mix of roughly half quality topsoil and half compost. That is the whole project in one breath, and most people can finish it in an afternoon.

    Raised beds are popular for good reason. They give you control over the soil, drain better than heavy clay ground, warm up earlier in spring, and save your back by lifting the garden closer to you. Below is a clear walkthrough covering the size, the wood, the tools, and the build, so you end up with a sturdy bed that lasts for years rather than one that rots out after a season or two.

    Raised Garden Bed: Quick Facts
    Common size 4 feet by 8 feet
    Maximum width 4 feet, so you can reach the center from either side
    Ideal depth 12 to 18 inches for most vegetables
    Best wood Cedar or redwood, naturally rot resistant
    Wood to avoid for edibles Pressure-treated lumber, due to chemical concerns
    Soil mix About half topsoil and half compost
    Sunlight needed 6 to 8 hours per day
    Skill level Beginner friendly
    Build time A few hours

    Why Build a Raised Bed at All?

    Before you pick up a drill, it helps to know what you are gaining. Raised beds solve several common gardening headaches at once.

    • You control the soil, so poor, sandy, or clay-heavy ground stops being a problem
    • Drainage improves, which lowers the risk of root rot
    • Fewer weeds creep in, since you start with fresh, clean soil
    • The soil warms earlier in spring, stretching your growing season
    • Less bending and kneeling makes the whole hobby easier on your body

    Choosing the Right Size

    Length is flexible, but width has a hard rule. Keep the bed no wider than about 4 feet so you can comfortably reach the middle from either side without stepping into it. Stepping on the soil compacts it, which is exactly what a raised bed is meant to avoid.

    A 4 by 8 foot bed is the classic choice because it fits standard lumber lengths and gives plenty of growing room. If you are short on space, a 4 by 4 bed works well and costs less. For depth, 12 inches suits most crops, and 18 inches gives deep-rooted vegetables like carrots and tomatoes room to stretch.

    Picking the Best Wood

    Wood choice decides how long your bed survives the weather. Damp soil sits against these boards year-round, so rot resistance matters.

    Wood type Lifespan Notes
    Cedar Long Naturally rot resistant, a top pick
    Redwood Long Durable and attractive, often pricier
    Pine or fir Shorter Cheap and easy to find, but rots faster
    Pressure-treated Long Best avoided for growing food

    Cedar and redwood are the favorites because they hold up for years without chemicals. Pine and fir cost less and are fine for a starter bed, though they will not last as long. Many gardeners skip pressure-treated lumber for vegetable beds, since the concern is that treatment chemicals could migrate into the soil where you grow food. If you do use pine, lining the inside walls with heavy plastic can extend its life.

    Tools and Materials You Will Need

    Gather everything before you start so the build goes smoothly. The list is short and forgiving.

    • Rot-resistant boards for the sides, cut to your chosen length
    • A few short pieces or 4 by 4 posts for the inside corners
    • Exterior-grade deck screws
    • A drill or driver and a saw, or have the store cut the wood for you
    • Hardware cloth for the base to block gophers and moles
    • Cardboard or landscape fabric to smother weeds underneath
    • Topsoil and compost to fill the bed

    Step-by-Step Build

    Here is the straightforward sequence. Take your time squaring the corners and the rest falls into place.

    Step 1: Prepare the spot. Pick a level, sunny location with six to eight hours of light. Clear the grass or weeds where the bed will sit, and make sure the ground is roughly flat so the frame does not wobble.

    Step 2: Assemble the frame. Arrange your four boards into a rectangle so the ends meet at the corners. At each corner, predrill holes to keep the wood from splitting, then drive deck screws through both boards. Adding a short corner post on the inside gives the joints extra strength.

    Step 3: Level and position. Set the finished frame onto the prepared spot. Check that it sits roughly level, adjusting by digging out a little soil or propping up a low corner. It does not need to be perfect, just close.

    Step 4: Line the base. Lay hardware cloth across the bottom if burrowing pests are a concern, then add a layer of cardboard or landscape fabric to block weeds from growing up into your soil. If the bed sits on open ground, leave the bottom otherwise open so it drains and roots can reach down.

    Step 5: Fill with soil. Fill the bed with a blend of about half quality topsoil and half compost. Skip the old advice about a gravel layer at the bottom, since it does not actually improve drainage. Rake the surface smooth and you are ready to plant.

    Filling and Feeding the Soil

    The soil is where your garden succeeds or struggles, so do not cut corners here. A rich, loose mix of topsoil and compost gives roots room to grow and plenty of nutrients. Each following season, top the bed with an inch or two of fresh compost as a mulch. This feeds the soil, holds moisture, and keeps weeds down without you having to dig everything out and start over.

    Where to Place Your Raised Bed

    Location can make or break your results, so choose the spot with care. Sunlight is the top priority, since most vegetables need six to eight hours of direct light to produce well. Watch your yard through the day and pick the brightest available area.

    Beyond sun, think about convenience and water. A bed close to the house and a water source is one you will actually tend, while a bed tucked in a far corner tends to get neglected. Avoid low spots where water pools, and keep the bed away from large tree roots that will compete with your plants for water and nutrients.

    Easy Crops for a First Raised Bed

    If you are new to growing, start with forgiving plants that reward you quickly. Early success builds confidence and keeps the hobby fun.

    • Lettuce and salad greens, which grow fast in shallow soil
    • Herbs like basil, parsley, and mint for the kitchen
    • Radishes, which are ready in just a few weeks
    • Bush beans, which are productive and low fuss
    • Tomatoes and peppers for a deeper bed with plenty of sun

    A Few Tips for Success

    • Position longer beds so tall plants do not shade shorter ones as the season goes on
    • Water deeply and less often to encourage strong, deep roots
    • Add a trellis to one end for climbing crops like beans, peas, and cucumbers
    • Group plants with similar water and sun needs together
    • Refresh the soil with compost every year to keep it productive

    Frequently Asked Questions

    How deep should a raised garden bed be?

    For most vegetables, 12 inches is enough, and 18 inches is better for deep-rooted crops like carrots and tomatoes. Over concrete or very poor ground, go deeper.

    What is the best wood for a raised bed?

    Cedar and redwood last longest because they naturally resist rot. Pine and fir are cheaper but shorter-lived. Many gardeners avoid pressure-treated lumber for beds used to grow food.

    What soil should I fill it with?

    A mix of roughly half quality topsoil and half compost works well. Skip the gravel layer at the bottom, as it does not help drainage.

    How wide should a raised bed be?

    No more than about 4 feet, so you can reach the center from either side without stepping on and compacting the soil.

    Does a raised bed need a bottom?

    Not if it sits on open soil. Leaving it open lets the bed drain and lets roots reach down. Hardware cloth across the base helps keep out burrowing pests.

  • Which Interior Design Style Are You? A KDadesignology Style Guide

    Which Interior Design Style Are You? A KDadesignology Style Guide

    There is no single correct interior design style. The right one for you is simply the style that fits your personality, your daily habits, and the way you actually live in your home. To figure out which interior design style you are, look closely at the colors, textures, and rooms you keep gravitating toward, then match those instincts to a recognized look such as minimalist, Scandinavian, modern farmhouse, boho, industrial, mid-century modern, traditional, or coastal.

    This matters more than it sounds. When you know your style, decorating gets easier and cheaper, because you stop buying random pieces that never quite work together. That is the whole idea behind the KDadesignology approach to style discovery: less about chasing trends, more about choosing a look you can comfortably live with every day. This guide walks you through the main styles and helps you land on yours.

    Finding Your Design Style
    Is there one right style? No, the best style fits your life and personality
    Popular styles Minimalist, Scandinavian, Modern Farmhouse, Boho, Industrial, Mid-Century, Traditional, Coastal
    How to find yours Notice the colors, textures, and rooms you are drawn to
    Can you mix styles? Yes, as long as a shared thread ties them together
    Main benefit of knowing Saves money and reduces clutter and clashing pieces
    Where to begin Define how you live, then pick a palette

    Why Knowing Your Style Actually Helps

    Picking a style is not about putting your home in a box. It is about giving your decisions a direction. When you know what you like, choosing colors, materials, and furniture becomes far simpler and far less stressful.

    There is a money angle too. People who do not know their style tend to replace furniture often, because rooms never feel quite right. Once you understand your design identity, you invest in pieces that last and fit, which cuts waste and clutter over time. A clear style is what makes a home feel intentional instead of accidental.

    A Quick Self-Check Before You Choose

    Before scrolling through styles, pause and answer a few honest questions. Your gut reactions reveal more than any trend photo.

    • Do you feel calmest in bright, uncluttered rooms or cozy, layered ones?
    • Are you drawn to neutral tones or bold colors and patterns?
    • Do you prefer sleek modern lines or warm, traditional details?
    • Do you host big gatherings, or value quiet, private spaces?
    • Do you have kids or pets that demand durable, practical materials?

    Hold onto those answers. As you read the styles below, one or two will click. That click is your starting point.

    The Most Popular Interior Design Styles

    Here is a clear breakdown of the main styles, what defines each, and the kind of person each tends to suit. Use it as a shortcut to spot your match.

    Style Defined by Best for people who
    Minimalist Clean lines, neutral tones, little clutter Value calm, order, and simplicity
    Scandinavian White walls, wood accents, cozy textiles, light Want simple but warm, not cold
    Modern Farmhouse Rustic wood, neutral palette, comfy pieces Love warmth, tradition, and function
    Boho Layered patterns, plants, eclectic finds Enjoy color, expression, and personality
    Industrial Exposed brick, metal, open space Like urban, raw, sophisticated looks
    Mid-Century Modern Tapered legs, wood tones, retro shapes Appreciate timeless, clean-lined design
    Traditional Symmetry, classic details, rich materials Value history, comfort, and familiarity
    Coastal Light blues, whites, natural textures Want an airy, relaxed, breezy feel

    A Closer Look at Each Style

    Minimalist

    If less genuinely feels like more to you, this is likely your lane. Minimalist design strips a room to its essentials: clean lines, neutral colors, and very little ornamentation. It is not cold or empty, it is intentional. Every piece earns its place, and negative space does real work.

    Scandinavian

    Often confused with minimalism, Scandinavian style is warmer and more human. Think white walls softened by wood accents, cozy textiles, and plenty of natural light. It delivers simplicity without the chill, which is why it appeals to so many people.

    Modern Farmhouse

    This look blends rustic charm with modern comfort. Neutral palettes, natural wood, and inviting furniture create a space that feels both current and homey. It suits people who want a family-friendly home that still looks put together.

    Boho

    Bohemian style is for the expressive. It layers patterns, textures, plants, and pieces collected over time into a relaxed, artistic space. There are fewer rules here, which is exactly the appeal for people who like personality over polish.

    Industrial

    Inspired by warehouses and factories, industrial style leans on exposed brick, metal fixtures, raw materials, and open layouts. It reads urban and sophisticated, and it suits people drawn to a bold, unfinished edge.

    Mid-Century Modern

    Defined by tapered legs, low-profile furniture, warm wood, and pops of retro color, this style has never really gone out of fashion. It is ideal for anyone who loves clean, timeless design with a nod to the 1950s and 60s.

    Traditional and Coastal

    Traditional interiors celebrate symmetry, classic details, and rich materials, offering a sense of stability and comfort rooted in history. Coastal style goes the opposite direction, with light blues, crisp whites, and natural textures that create an airy, breezy retreat. Both are strong choices depending on whether you crave formality or ease.

    It Is Fine to Mix Styles

    Here is something many people do not realize: you do not have to commit to one label. Most personal homes actually blend a few styles. Your living room might lean modern while holding a few rustic touches. Your kitchen might read Scandinavian but with vintage lighting.

    The secret to mixing well is cohesion. Pick a unifying thread, usually a shared color palette or a repeated material, so the rooms feel connected rather than chaotic. When you reflect on how you use your space and what puts you at ease, your true style tends to reveal itself, and that is when you can confidently answer which interior design style you are.

    How Your Lifestyle Shapes Your Style

    Your taste is only half the equation. How you actually live should steer your choices just as much. A style that looks stunning in photos can be miserable to live with if it does not fit your routine.

    Think about the practical side. If you host large gatherings, you need flexible seating and durable surfaces. If you have young children or pets, delicate white upholstery and fragile decor will fight you daily. Someone working from home needs a functional, calm setup, while a creative might crave a more expressive, stimulating space. Matching your style to your real life is what keeps a home comfortable long after the novelty fades.

    Trendy or Timeless?

    Interior design in recent years has moved away from cold, showroom perfection toward warmer, more personal spaces. That shift is worth remembering when you choose a style. Trends can be fun, but building your whole home around a passing fad often leads to regret and costly do-overs.

    A smart approach is to anchor a room in a timeless base, usually neutral walls and quality furniture, then layer trends through easily swapped items like cushions, art, and accessories. This lets you stay current without gutting the room every few years, and it keeps your style feeling like yours rather than a copy of this season’s catalog.

    Where to Find Inspiration

    Once you have a sense of your direction, feed it with focused inspiration. Save images that pull at you and study what they share, whether it is a color, a material, or a mood. Patterns will emerge quickly, and those patterns are your style taking shape.

    Look beyond just one source. Design magazines, show homes, furniture showrooms, and even well-styled cafes and hotels all offer ideas you can adapt. The goal is not to copy a room wholesale but to collect elements that feel right and translate them into a space that suits your own home and habits.

    Frequently Asked Questions

    How do I find my interior design style?

    Notice the colors, textures, and rooms you are naturally drawn to, then match those instincts to a recognized style. Your daily habits and comfort preferences point the way more reliably than trend images.

    Can I combine more than one style?

    Yes. Blending styles is common and often makes a home feel personal. The key is a unifying thread, like a shared palette or material, so the mix looks intentional.

    Why does knowing my style matter?

    It makes decorating decisions easier, prevents clashing purchases, reduces clutter, and saves money by helping you invest in pieces that actually fit and last.

    What is the easiest style for beginners?

    Minimalist and Scandinavian are approachable starting points because their neutral bases and simple rules are forgiving and easy to build on over time.

  • How to Be Better at Interior Design: A Practical MintPalDecor Guide

    How to Be Better at Interior Design: A Practical MintPalDecor Guide

    The fastest way to get better at interior design is to learn a handful of core principles, plan a room around how it actually functions before you worry about how it looks, and then practice those ideas in your own space. Good design is not a talent you are born with. It is a skill anyone can build with a little knowledge and steady repetition, which is exactly the approach MintPalDecor readers tend to look for.

    If you have ever felt a room looks off but could not say why, the answer usually lives in the basics. Balance, scale, lighting, and flow do more heavy lifting than any single expensive piece of furniture. Once you understand how those elements work together, decorating stops feeling like guesswork and starts feeling like a process you can repeat in any room.

    Interior Design Basics at a Glance
    Is it learnable? Yes, it is a skill, not an inborn talent
    Core principles Balance, proportion, scale, rhythm, contrast, harmony
    Start with The room’s purpose and how you use it
    Biggest beginner mistake Buying furniture before planning the layout
    Most underused tool Layered lighting
    Budget approach Invest in a few key pieces, layer in accessories
    Best way to improve Study well-designed spaces and practice often

    Start With the Fundamentals

    Every polished room rests on a few timeless principles. You do not need a design degree to use them, but you do need to recognize them. Think of these as the grammar of a space. Once you know them, everything else reads more clearly.

    • Balance: spreading visual weight evenly, either symmetrically or with contrasting pieces
    • Proportion and scale: sizing furniture and decor to fit the room rather than fighting it
    • Rhythm: repeating colors, shapes, or textures so the eye moves smoothly
    • Contrast: pairing light with dark or rough with smooth to create interest
    • Harmony: tying everything together with a shared thread, often a palette or material

    When a space feels chaotic, one of these is usually missing. A room stuffed with mismatched pieces lacks harmony. A tiny sofa lost against a huge wall lacks scale. Naming the problem is half the fix.

    Function Comes Before Beauty

    Here is the mindset shift that separates confident designers from frustrated ones. A beautiful room that does not work is a failed room. Before choosing a single color or chair, ask what the space needs to do.

    How many people use it? What activities happen there? What currently annoys you about it? If a living room lacks storage, another decorative basket will not solve the clutter. If seating blocks the path through the room, a prettier rug will not fix the awkward flow. Solve the real problem first, then make it look good.

    Learn to Work With Color

    Color is one of the strongest tools you have, and it shapes mood before anyone notices the furniture. Warm tones bring energy and coziness. Cool tones create calm and a sense of space. Neutral bases give you flexibility and a timeless feel that is easy to update later.

    A simple rule keeps things from going sideways: limit your main palette to about three colors per room. Choose one dominant shade, one secondary, and one accent. This structure looks intentional rather than random, and it is the quiet backbone of many spaces MintPalDecor readers admire.

    Color mood What it does Good for
    Warm tones Add energy and comfort Living and dining rooms
    Cool tones Create calm and space Bedrooms and bathrooms
    Neutrals Offer flexibility and elegance Any room, as a base
    Bold accents Draw the eye and add personality Pillows, art, small decor

    Get the Lighting Right

    Lighting is the tool beginners overlook most, and it controls how every color, texture, and finish reads. A gorgeous room under a single harsh ceiling light will still feel flat. The fix is layering, which means combining three types of light.

    • Ambient: the general light that fills the room, like ceiling fixtures
    • Task: focused light for reading, cooking, or working
    • Accent: light that highlights art, plants, or architectural features

    Warm bulbs make a space feel inviting, while cooler bulbs read modern and crisp. Adding a dimmer is one of the cheapest upgrades with the biggest payoff, since it lets a single room shift from bright and functional to soft and relaxed.

    Respect Scale and Proportion

    Scale problems are behind more awkward rooms than almost anything else. A sofa too small for a large wall looks lonely. A massive sectional in a tight room feels suffocating. Before buying, measure your space and even tape out furniture footprints on the floor.

    The same idea applies to art and rugs. Art hung too high or too small floats without an anchor. A rug that only touches the front legs of the furniture can make a room feel disjointed. Sizing things correctly is unglamorous work, but it is what makes a space feel settled.

    Add Depth With Texture and Layers

    A room built from a single material feels one-note. Mixing textures gives a space depth and warmth without adding clutter. Pair a smooth leather chair with a chunky knit throw. Set a sleek glass table on a woven rug. Combine wood, metal, fabric, and greenery.

    Layering is how designers make rooms feel finished. It is not about piling on more stuff, it is about variety in what you already choose. A few contrasting textures can make even a simple, neutral room feel rich and considered.

    Plan the Layout and Flow

    Space planning is the backbone of a functional room. People need clear paths to move through a space, and furniture should support the way they gather. In a living room, seating should encourage conversation rather than everyone facing a screen from across the room. In a dining area, chairs should pull out without hitting a wall.

    Every well-designed room also has a focal point, whether it is a fireplace, a large window, a bold sofa, or a piece of art. Arrange furniture to support that focal point rather than competing with it. When the layout has a clear anchor and open pathways, the whole room feels calmer.

    Common Beginner Mistakes to Avoid

    A few habits trip up almost everyone at the start. Dodging them will instantly raise the quality of your rooms.

    • Pushing all the furniture against the walls, which leaves the center empty and awkward
    • Overcrowding shelves and surfaces until nothing stands out
    • Choosing paint before considering lighting, when light changes how color looks
    • Buying trendy pieces you will tire of instead of quality basics you can restyle
    • Ignoring negative space, since empty room is what lets key pieces breathe

    A Simple Way to Keep Improving

    Getting better is mostly about attention and practice. You do not need a big budget to sharpen your eye. Try these habits and your instincts will grow fast.

    • Study spaces you love and name exactly what works, whether it is the palette or the lighting
    • Visit furniture showrooms and open houses to see professional staging in person
    • Start with small, low-risk projects like styling a shelf or rearranging one room
    • Keep a folder of images you are drawn to and look for the patterns they share
    • Treat mistakes as lessons, since they teach faster than getting it right the first time

    Add Personality With Accessories

    Once the bones of a room are right, accessories are what make it feel like yours. This is the fun, low-cost stage where you can experiment without much risk. Art, cushions, plants, books, and small objects inject character that furniture alone cannot.

    The key is restraint. A few meaningful pieces read as curated, while a surface crammed with knickknacks reads as clutter. Modern rooms feel high-end precisely because they let a handful of standout items breathe. When in doubt, remove one thing rather than add another, and let negative space do its quiet work.

    Frequently Asked Questions

    Can anyone learn interior design?

    Yes. Interior design is a skill built on learnable principles like balance, scale, and color. With study and consistent practice, anyone can create rooms that feel polished and functional.

    Where should a beginner start?

    Start with the room’s purpose and layout, not the decor. Define how the space is used, fix any function problems, then move on to color, lighting, and finishing touches.

    What is the most common design mistake?

    Buying furniture before planning. Choosing pieces that do not fit the scale or flow of a room leads to wasted money and awkward spaces.

    How many colors should a room have?

    A good rule is about three: one dominant color, one secondary, and one accent. This keeps a space cohesive without feeling flat or chaotic.

  • Why Home Improvement Is Important: The MintPalHouse Guide to Smarter Upgrades

    Why Home Improvement Is Important: The MintPalHouse Guide to Smarter Upgrades

    Home improvement is important because it protects and grows one of the biggest investments most people ever make, while making daily life safer, more comfortable, and more efficient. The reason the topic matters so much for MintPalHouse readers is simple: a home that is well maintained holds its value, avoids costly emergencies, and feels better to live in. Regular upgrades are not just about looks. They keep a property functional, healthy, and ready for whatever life brings next.

    If you take away one idea, let it be this. Small, steady improvements almost always cost less than the big repairs you get hit with by ignoring your home. A little attention now prevents a lot of pain later. Below, this MintPalHouse guide breaks down exactly why home improvement deserves a spot on your priority list, and where your time and money go furthest.

    Why Home Improvement Matters: Key Benefits
    Property value Well-kept homes hold value and appeal to buyers
    Safety Fixing hazards protects your family and prevents accidents
    Comfort Better layout and design improve everyday living
    Energy efficiency Upgrades lower utility bills and waste less
    Health Good air, light, and moisture control support wellbeing
    Cost control Small fixes prevent expensive emergency repairs
    Future-proofing Adapting the home fits changing family needs
    Mental wellbeing A clean, pleasant space reduces daily stress

    It Protects and Builds Property Value

    Start with the money, since that is what many people care about most. Buyers are drawn to homes that look modern, well maintained, and ready to move into. Even modest updates can lift a property’s appeal in a competitive market. Neglect does the opposite, chipping away at value year after year.

    Some projects consistently return more than others. You do not have to do all of them, but knowing which upgrades carry weight helps you spend wisely.

    High-value upgrade Why buyers care
    Kitchen refresh It is the room buyers judge first
    Updated bathroom Signals the home is well cared for
    Curb appeal and paint Creates a strong first impression
    Energy-efficient features Promises lower future bills
    Fresh flooring Makes the whole home feel newer

    It Keeps Your Home Safe

    This is the quieter reason home improvement matters, and arguably the most important. Homes age, and aging brings risk. Old wiring can spark fires. Leaky roofs invite water damage and mold. Worn flooring turns into a slip hazard, especially for young children and older adults.

    Bringing a home up to current standards removes these dangers before they become emergencies. Simple additions like slip-resistant bathroom flooring or motion-sensor lighting near entrances add real protection without a big budget. Safety upgrades rarely get attention on social media, but they are the ones that quietly keep people out of harm’s way.

    It Makes Everyday Life More Comfortable

    A home is where you sleep, work, relax, and build memories. When it functions well, you feel it in small ways every day. More storage cuts clutter. Better lighting lifts a room and your mood. A smarter layout removes the little friction points that wear on you over time.

    This is a core part of why home improvement is important for MintPalHouse readers. It is not about impressing anyone. It is about upgrading your own quality of life in the place you spend most of your hours.

    It Saves Money on Energy

    Efficiency upgrades pay you back month after month. Swapping old bulbs for LEDs, sealing drafts, adding insulation, and choosing efficient appliances all trim utility bills. Over a year those savings add up, and they cushion you against rising energy costs.

    There is an environmental angle too. Homes that use less power and water leave a smaller footprint, and eco-conscious features increasingly appeal to buyers who share those values. You can start small with LED bulbs, low-flow fixtures, and low-VOC paint, then expand from there.

    It Supports Health and Wellbeing

    The link between a home and health is stronger than many people realize. Poor ventilation traps stale air. Damp corners breed mold. Bad insulation makes rooms uncomfortable and drives up energy strain. Fixing these issues improves indoor air quality and makes the whole space healthier to live in.

    There is a mental side as well. A clean, organized, well-designed home creates a calmer environment. Clutter-free rooms are easier to move through, and a pleasant space genuinely lowers daily stress. Finishing a project, even a small one, brings a quiet sense of pride and ownership.

    It Prevents Expensive Repairs

    Here is a truth every homeowner learns eventually. Problems do not fix themselves, and they rarely get cheaper with time. A small roof leak becomes a ceiling replacement. A slow plumbing drip becomes water damage. Aging electrical becomes a serious hazard.

    Regular maintenance catches these issues early, when they are cheap and simple to handle. Spending a little on upkeep is almost always smarter than waiting for a crisis. That said, plan carefully, since poor planning can cause delays and extra costs of its own.

    It Future-Proofs Your Home

    Life changes, and a home should be able to change with it. Maybe you are welcoming a new family member, shifting to remote work, or caring for aging parents. Thoughtful improvements let a home adapt without the expense and upheaval of moving.

    This kind of flexible thinking is one of the strongest reasons why home improvement is important. It keeps your home working for you across different seasons of life, rather than forcing you to start over somewhere new.

    Getting Started the Smart Way

    You do not need to renovate everything at once. The MintPalHouse approach is steady, planned progress that fits your budget and your needs.

    • Fix safety and maintenance issues first, before cosmetic work
    • Set a clear budget and a simple plan before you start
    • Begin with high-impact, low-cost wins like paint and lighting
    • Choose upgrades that add real value, not just novelty
    • Keep records of what you improve for future reference and resale

    Smart Home Technology Adds Real Value

    Improvement is not only about paint and plumbing anymore. Smart home technology has made upgrades easier and more purposeful, and it appeals strongly to modern buyers. A smart thermostat learns your routine and trims energy use. Automated lighting and security systems add both convenience and peace of mind. Voice assistants handle small tasks from locking doors to setting reminders.

    The best part is that you can start small and grow over time. Many smart systems are modular, so a single smart plug or bulb today can expand into a fuller setup later. These features are not just gadgets. They boost comfort, cut waste, and increasingly show up on buyer wish lists, which ties directly into why home improvement is important for anyone thinking about resale.

    Do Not Forget the Outdoors

    Improvement stops too often at the front door, but outdoor spaces carry real weight. Gardens, patios, and balconies extend your living area and give the family calm spots to relax. They also shape the first impression a home makes, which matters enormously for value.

    You do not need a full landscape overhaul to see a difference. Tidy planting beds, a fresh coat on the front door, clean walkways, and simple outdoor lighting all lift curb appeal. A welcoming exterior tells visitors and buyers that the home is cared for before they ever step inside.

    Plan Before You Spend

    One caution runs through every smart improvement strategy: plan carefully. Poor planning leads to delays, complications, and extra costs that eat into your budget. Avoid pouring money into features that do not add real value or fit your life. A clear strategy before starting any project keeps the work on track and the spending under control.

    Think of home improvement as a long game rather than a one-time event. Steady, well-chosen upgrades strengthen your property as an investment, support a higher resale value, and keep the home durable for years. That long-term view is the heart of the MintPalHouse approach.

    Frequently Asked Questions

    Why is home improvement important?

    It protects property value, keeps a home safe and healthy, improves comfort and efficiency, and prevents small issues from turning into expensive repairs.

    Does home improvement really increase value?

    Yes. Well-chosen upgrades like kitchen refreshes, updated bathrooms, and better curb appeal make a home more attractive to buyers and help preserve long-term equity.

    What should I improve first?

    Start with anything affecting safety and maintenance, such as roofing, wiring, and plumbing. Then move to high-impact, low-cost updates like paint, lighting, and fixtures.

    Is home improvement worth it if I am not selling?

    Absolutely. Beyond resale, improvements make daily life more comfortable, cut energy bills, support health, and reduce stress in the space where you spend most of your time.

  • Is Home Improvement Tax Deductible? A Clear Guide for Homeowners

    Is Home Improvement Tax Deductible? A Clear Guide for Homeowners

    Most home improvements are not tax deductible in the year you pay for them. The general rule from the IRS is that upgrading your own home is a personal expense, not a write-off. That said, there are real exceptions worth knowing, because certain projects can lower your taxes now, and many others can reduce what you owe later when you sell.

    So the honest answer is: sometimes, and it depends on the type of project. Improvements made for medical reasons, qualifying home office use, and rental property can offer benefits sooner. Larger capital improvements do not pay off right away, but they raise your home’s cost basis, which can shrink your taxable profit at sale. This guide breaks down each path in plain language. One note first: this is general information, not tax advice, and rules change, so confirm your situation with a qualified tax professional or current IRS guidance before filing.

    Home Improvement Tax Treatment at a Glance
    Most improvements Not deductible in the year you pay
    Capital improvements Raise cost basis, lower capital gains at sale
    Medical modifications May be deductible if they meet IRS medical rules
    Home office upgrades May qualify for self-employed homeowners
    Rental property work Often deductible or depreciated over time
    Energy efficiency credits Federal home energy credits expired Dec 31, 2025
    Routine repairs Generally not deductible on a personal home
    Key habit Keep every receipt and record

    First, Know the Difference: Deduction vs Credit

    These two terms get mixed up constantly, and the difference affects real money. A tax deduction lowers your taxable income before your bill is calculated. A tax credit is stronger because it reduces the tax you owe dollar for dollar, and it can even boost a refund.

    When people ask whether home improvements are deductible, they often really want to know if any tax break exists at all. Sometimes the answer is a deduction, sometimes it is a credit, and often it is neither until you sell.

    Capital Improvements and Your Cost Basis

    This is the most important concept for the average homeowner. A capital improvement is a permanent upgrade that adds value, extends the life of the home, or adapts it to a new use. Think a new roof, a room addition, a major kitchen remodel, or a new HVAC system.

    These do not give you a deduction the year you pay. Instead, they add to your cost basis, which is essentially the IRS measure of what you have invested in the property. A higher basis means a smaller taxable gain when you eventually sell.

    Counts as a capital improvement Does not count (repairs)
    New roof Patching a small leak
    Room addition Repainting a single wall
    Major kitchen or bath remodel Fixing a broken tile
    New central air or heating system Servicing an existing unit
    Finished basement Replacing a cracked window pane

    There is a catch worth remembering. When you sell a primary home, a large portion of the gain is often shielded by the home sale exclusion, which is $250,000 for single filers and $500,000 for married couples filing jointly. If your gain already sits under that limit, extra basis may not save you anything more. Still, tracking improvements costs nothing and protects you if your gain runs high.

    Medical-Related Improvements

    If you modify a home mainly for medical care, part of the cost can sometimes be deducted as a medical expense. Common examples include wheelchair ramps, widened doorways, support bars, and accessible bathroom changes for a person with a disability or medical condition.

    Two limits apply. The improvement has to be primarily for medical care rather than general comfort or luxury, and any amount that raises the home’s overall value is subtracted from the deductible portion. Medical expenses are also only deductible to the extent they exceed a set percentage of your adjusted gross income, and you have to itemize to claim them.

    Home Office Improvements

    Homeowners who are self-employed and use part of the home regularly and exclusively for business may deduct improvements tied to that space. Repairs to the office area can often be deducted, while larger improvements are usually capitalized and recovered over time.

    One important limit: this generally applies to self-employed people and business owners, not to W-2 employees who work remotely. A full-time remote worker on a company payroll typically cannot claim the home office deduction.

    Rental Property Is Different

    The rules shift once a property earns income. Improvements to a rental are treated as investments in the business, so they can often be recovered through depreciation over several years, and many repairs can be deducted in the year they happen. If you rent out part of your home or a separate property, the tax picture is more generous than it is for your personal residence.

    Energy-Efficient Upgrades: An Important Update

    For several years, homeowners could claim federal credits for energy-efficient upgrades like solar panels, heat pumps, insulation, efficient windows, and energy audits. These were credits rather than deductions, which made them especially valuable.

    Here is the key change to note: the main federal home energy improvement credits expired at the end of December 2025. If you completed a qualifying upgrade before that date, you may still be able to claim it for that tax year, but new projects after the expiration generally do not qualify under those programs. Because energy tax law shifts often, confirm the current status before counting on any credit.

    Why Record-Keeping Matters So Much

    Whether the benefit comes now or years down the road, documentation is what makes it real. Without receipts, you cannot prove a basis adjustment or support a deduction if questions come up.

    • Save receipts and invoices for every improvement, big or small
    • Keep both paper and digital copies in case one is lost
    • Note the date, the cost, and a short description of each project
    • Hold on to records for as long as you own the home, plus a few years after selling

    Quick Summary Table

    Situation Typical tax outcome
    Remodeling your own kitchen Not deductible now, adds to cost basis
    Adding a wheelchair ramp for medical need May be deductible as a medical expense
    Upgrading a self-employed home office May qualify for a deduction
    Improving a rental unit Often depreciated or deducted
    Installing solar after Dec 2025 Federal credit has expired
    Fixing a leaky faucet Not deductible on a personal home

    What About Loan Interest for Renovations?

    Many people fund big projects with borrowed money, and the interest can sometimes carry a tax angle. Interest on a home equity loan or line of credit has historically been deductible when the funds are used to buy, build, or substantially improve the home that secures the loan. Rules around this have shifted in recent years, so the treatment depends on how the money is used and the current tax law.

    This is another area where the details matter and change over time. If you plan to borrow for a renovation and want to claim interest, confirm the current rules and keep clear records showing the loan paid for qualifying home improvements.

    A Simple Worked Example

    Picture a homeowner who buys a house for $300,000 and, over several years, spends $60,000 on capital improvements: a new roof, a kitchen remodel, and a room addition. None of that $60,000 is deductible in the years it is spent.

    Later, they sell the home for $500,000. Their cost basis is not the original $300,000, it is $360,000 once the improvements are added in. That raises the basis and shrinks the taxable gain from $200,000 down to $140,000. For a single filer, the home sale exclusion of $250,000 may cover the entire gain, but the records still protect them if the numbers had run higher. This is exactly why saving receipts pays off years down the road.

    Frequently Asked Questions

    Are home improvements tax deductible?

    Most are not deductible in the year you pay. Exceptions include qualifying medical modifications, home office upgrades for the self-employed, and rental property work. Capital improvements reduce taxes later by raising your cost basis.

    Do home improvements reduce capital gains tax?

    Yes, capital improvements add to your cost basis, which lowers the taxable gain when you sell. However, if the home sale exclusion already covers your gain, the extra basis may not add savings.

    Can I deduct a new roof or HVAC system?

    Not immediately on a personal home. These are capital improvements that increase your basis rather than giving a same-year deduction.

    Are energy-efficient upgrades still eligible for tax credits?

    The main federal home energy credits expired at the end of December 2025. Upgrades completed before that date may still qualify for that tax year. Check current IRS guidance, since these rules change.

    Disclaimer: This article is general information and not tax, legal, or financial advice. Tax rules change and vary by situation. Please consult a qualified tax professional or current IRS guidance before making decisions.

  • Bathroom Home Improvement: Ideas, Costs, and a Smart Plan for Your Remodel

    Bathroom Home Improvement: Ideas, Costs, and a Smart Plan for Your Remodel

    Bathroom home improvement covers any project that updates, repairs, or upgrades a bathroom, from swapping a faucet for a few dollars to a full gut renovation that runs into the tens of thousands. The good news for most homeowners is that you do not need a huge budget to make a real difference. A fresh coat of paint, new fixtures, and better lighting can transform a tired space over a single weekend.

    If you are deciding where to start, focus first on anything that affects function and safety, such as leaks, poor ventilation, or worn flooring. Cosmetic touches like paint and hardware come next, and big-ticket work like moving plumbing or replacing a tub sits at the top of the cost ladder. This guide walks through the main options, rough costs, and a sensible order for planning the work.

    Bathroom Remodel: Quick Overview
    Project range Minor refresh to full gut renovation
    Typical minor refresh cost A few hundred to a couple thousand dollars
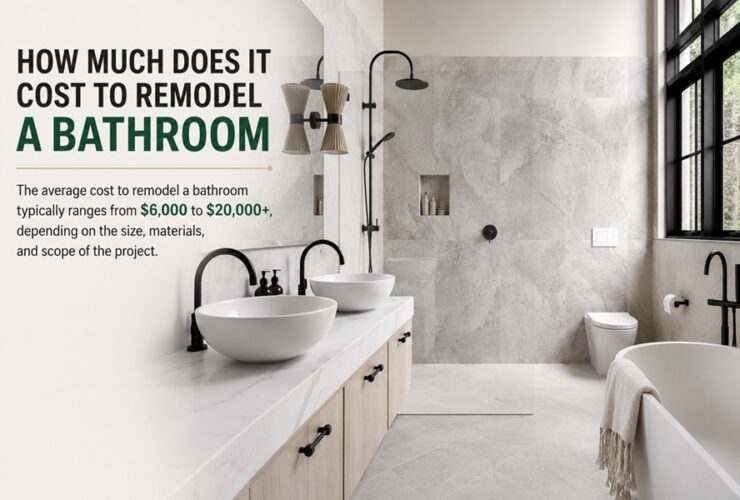
    Typical mid-range remodel cost Roughly $6,000 to $15,000
    Typical high-end remodel cost $20,000 and up
    Common timeline A weekend for small updates, 2 to 4 weeks for full remodels
    DIY friendly tasks Painting, hardware, fixtures, caulking, accessories
    Pro recommended tasks Plumbing relocation, electrical, tiling, tub or shower swaps
    Return on investment Often one of the stronger interior upgrades for resale

    Types of Bathroom Improvements

    Bathroom projects fall into a few broad buckets. Knowing which one you are taking on helps set the budget and decide whether you need a professional.

    Cosmetic refresh

    This is the lightest touch and the friendliest to a small budget. Think paint, a new mirror, updated cabinet handles, a modern faucet, and a fresh shower curtain or glass panel. Nothing structural changes, and most of it can be done without a contractor.

    Mid-range update

    Here you start replacing rather than just refreshing. New vanity, new toilet, updated flooring, and a re-tiled shower surround all fall in this range. Some tasks stay DIY, but tiling and plumbing often go smoother with a pro.

    Full renovation

    This is the big one. Layouts change, plumbing gets moved, and everything from the subfloor up may be replaced. A full renovation delivers the biggest visual payoff, but it also carries the highest cost, the longest timeline, and the most need for skilled trades.

    What a Bathroom Remodel Costs

    Prices swing widely based on the size of the room, the quality of materials, and where you live. Still, it helps to see the pieces broken out so you can spot where the money goes and where you can trim.

    Element Rough cost range Notes
    Paint and hardware $100 to $600 Highest impact for the lowest spend
    New faucet and fixtures $150 to $800 Easy DIY in most cases
    Vanity and sink $500 to $3,000 Cost rises fast with size and material
    Toilet replacement $200 to $900 Includes the unit and basic install
    Flooring $600 to $3,500 Vinyl is cheapest, tile costs more
    Shower or tub swap $1,500 to $8,000 Plumbing work drives the price
    Full tile work $1,000 to $5,000 Labor is the bulk of the cost

    Use these as ballpark figures, not quotes. Getting two or three estimates from local pros is the only way to know the real number for your space.

    Where a Small Budget Goes Furthest

    If you only have a few hundred dollars, spend it where the eye lands first. A clean, bright room reads as updated even without new tile or a new tub.

    • Repaint the walls in a moisture-friendly finish for an instant lift
    • Swap the faucet, showerhead, and cabinet pulls for a modern set
    • Replace the mirror and add layered lighting for a bigger, brighter feel
    • Re-caulk the tub and sink to kill that grimy, aging look
    • Add a new vanity light or upgrade to warmer LED bulbs

    DIY or Hire a Pro?

    The line between a satisfying weekend project and an expensive mistake usually runs through the plumbing and electrical. Cosmetic swaps are well within reach for most homeowners. Once water lines move or wiring changes, the stakes go up, and a licensed pro protects you from leaks, code violations, and water damage.

    Safe to DIY Better left to a pro
    Painting and caulking Moving plumbing lines
    Changing hardware Electrical rewiring
    Installing a faucet Full shower or tub installs
    Hanging a mirror or shelf Large-format tile and waterproofing

    Common Mistakes to Avoid

    A few missteps show up again and again in bathroom projects. Dodging them saves money and regret.

    • Skipping ventilation, which invites mold and peeling paint
    • Choosing style over grip, since slick tile gets dangerous when wet
    • Underestimating storage and ending up with clutter on every surface
    • Forgetting to seal grout, which stains and traps moisture over time
    • Starting demolition before materials arrive, which stretches the timeline

    A Simple Planning Order

    Working in the right sequence keeps a remodel from turning into chaos. Here is a straightforward order that most projects can follow.

    • Set a realistic budget and add a cushion of about 10 to 15 percent for surprises
    • Decide on the layout and whether plumbing needs to move
    • Pick materials and order them before any demolition begins
    • Handle behind-the-wall work first: plumbing, electrical, and waterproofing
    • Move on to surfaces: flooring, tile, and paint
    • Finish with fixtures, lighting, and accessories

    Ideas for a Small Bathroom

    Not every home has a spacious primary bath, and tight rooms bring their own challenges. The trick is to make the space feel bigger and work harder without knocking down walls. A few well-chosen moves can turn a cramped bathroom into one that feels calm and open.

    • Use light, cohesive colors to make walls recede and open up the room
    • Choose a wall-mounted or floating vanity to free up visible floor space
    • Swap a bulky vanity door for open shelving or slim drawers
    • Install a large mirror to bounce light and double the sense of space
    • Pick a corner sink or a compact toilet where every inch counts

    Storage is the real battle in a small bathroom. Vertical shelving above the toilet, recessed niches in the shower, and slim rolling carts squeeze in function without eating up the footprint.

    Choosing Materials That Last

    Bathrooms take a daily beating from moisture, heat, and constant use, so material choice is not just about looks. The wrong flooring warps, the wrong paint peels, and cheap fixtures corrode. Spending a little more on the right materials often costs less over the life of the room.

    Material choice Why it works in a bathroom
    Porcelain or ceramic tile Water resistant, durable, easy to clean
    Luxury vinyl plank Handles moisture well at a lower price
    Semi-gloss or satin paint Resists moisture better than flat finishes
    Quartz countertops Non-porous and low maintenance
    Solid brass or stainless fixtures Stand up to constant water exposure

    Do Not Skip Ventilation and Moisture Control

    This is the piece homeowners overlook most, and it quietly ruins good work. Without proper airflow, steam lingers, and that trapped moisture leads to mold, mildew, peeling paint, and warped surfaces. A quality exhaust fan is not a luxury, it is the thing protecting your whole remodel.

    Run the fan during and after every shower, seal grout and caulk lines to block water intrusion, and check for hidden leaks before you close up any walls. Getting moisture control right is what keeps a beautiful bathroom looking new instead of tired within a couple of years.

    Frequently Asked Questions

    How much does a bathroom remodel cost?

    A minor refresh can be a few hundred dollars, a mid-range remodel often lands between $6,000 and $15,000, and a high-end renovation can exceed $20,000. Local labor rates and material choices shift these numbers a lot.

    What adds the most value in a bathroom?

    Clean, functional updates tend to pay off best: a modern vanity, good lighting, fresh paint, and updated fixtures. Buyers respond to bathrooms that look bright, well kept, and move-in ready.

    Can I remodel a bathroom myself?

    You can handle cosmetic work such as paint, hardware, and simple fixtures. Plumbing relocation, electrical work, and full shower installs are safer with a licensed professional.

    How long does a bathroom remodel take?

    Small updates can be done in a weekend. A full remodel usually runs two to four weeks, depending on the scope and how quickly materials and trades line up.

  • Lowe’s Home Improvement: Stores, Products, Services, and What to Know Before You Shop

    Lowe’s Home Improvement: Stores, Products, Services, and What to Know Before You Shop

    Lowe’s is one of the two biggest home improvement retailers in the United States, operating roughly 1,700 large-format stores that sell nearly everything a person needs to build, fix, or decorate a home. If you have ever wondered what Lowe’s actually is, the plain answer is this: it is a one-stop shop for tools, lumber, appliances, paint, flooring, and garden supplies, backed by delivery and installation services for the jobs most people would rather not tackle alone.

    The company ranks second in the market, just behind The Home Depot, and it has spent decades serving two very different crowds at the same time. Weekend do-it-yourselfers wander the aisles looking for a new faucet, while contractors load flatbed carts with drywall and framing lumber. Whether the task is hanging a single shelf or gutting a kitchen, the store is designed to hand you the materials, the guidance, and sometimes the labor to see it through.

    Lowe’s Companies, Inc. at a Glance
    Company type Public (NYSE: LOW)
    Industry Retail, home improvement
    Founded 1921 in North Wilkesboro, North Carolina
    Founder Lucius Smith Lowe
    Headquarters Mooresville, North Carolina
    CEO Marvin Ellison (Chairman, President, and CEO)
    Number of stores About 1,700 across the United States
    Employees Around 270,000 to 300,000 associates
    Annual revenue Roughly $83.7 billion (fiscal 2024)
    Main rival The Home Depot
    Products Appliances, tools, lumber, paint, flooring, plumbing, hardware, garden, decor
    Website lowes.com

    A Quick Look at How Lowe’s Got Here

    The story starts more than a century ago with a small hardware store in North Carolina. Over time that single shop grew into a national chain, and today the business runs on a scale that would have been hard to imagine in 1921. The headquarters sits in Mooresville, and every store is company owned. Lowe’s does not franchise, which means the brand keeps tight control over how each location looks, stocks, and serves customers.

    For years Lowe’s held the top spot in the industry. That changed in 1989 when The Home Depot pulled ahead. Since then the two chains have traded punches across pricing, store layout, and online shopping, and the rivalry still shapes a lot of what both companies do.

    More recently the company leaned hard into technology. Under CEO Marvin Ellison, Lowe’s focused on what he calls retail fundamentals, meaning stocked shelves, clean stores, and a smoother website. The chain also rolled out a generative AI shopping assistant to help customers plan projects and locate items inside the store.

    What You Can Actually Buy at Lowe’s

    The product range is wide enough that most home projects can be sourced from a single visit. Instead of listing hundreds of items, here is how the store generally breaks down its departments:

    Department What you will find
    Appliances Refrigerators, ranges, washers, dryers, dishwashers, microwaves
    Building materials Lumber, drywall, insulation, concrete, roofing, siding
    Tools Power tools, hand tools, tool storage, and accessories
    Paint Interior and exterior paint, stains, primers, sprayers, supplies
    Flooring Hardwood, laminate, vinyl, tile, and carpet
    Kitchen and bath Cabinets, countertops, sinks, faucets, vanities, toilets
    Lawn and garden Plants, soil, mowers, grills, patio furniture, outdoor power gear
    Electrical and lighting Wiring, fixtures, ceiling fans, smart home devices

    The chain carries both national brand names and its own private labels. That mix lets shoppers choose between a recognized brand and a lower-priced store option that often does the same job.

    Services That Go Beyond the Shelves

    Lowe’s sells more than products. A large part of the business is helping people finish projects they cannot or would rather not handle themselves. Installation is arranged through independent contractors, so buying a dishwasher or new carpet can also include getting it fitted.

    • Installation for flooring, appliances, windows, doors, and more
    • Free or low-cost delivery on large items and bulk orders
    • Protection plans and repair services for appliances and tools
    • Tool and equipment rental at many locations
    • A dedicated pro desk and bulk pricing for contractors through LowesForPros.com

    These add-ons matter because they turn a hardware run into a full service. A homeowner replacing a water heater, for example, can buy the unit, schedule the install, and set up a warranty in one trip.

    Lowe’s vs The Home Depot: The Short Version

    People often ask which store is better, and the honest answer is that they are close competitors with slightly different personalities. Home Depot has long leaned toward the professional contractor and the serious builder. Lowe’s has traditionally aimed a bit more at the everyday homeowner, with store layouts and displays that feel a touch more retail than warehouse.

    Pricing tends to run neck and neck, and both chains price match under their own policies. The right choice usually comes down to which store is closer, which one stocks the specific brand you want, and where you feel more comfortable browsing.

    Factor Lowe’s The Home Depot
    Market rank (US) Second First
    Core shopper Homeowners and DIY Pros and heavy builders
    Store feel More retail styled More warehouse styled
    Pricing Very competitive Very competitive

    Store Brands Worth Knowing

    Part of shopping smart at Lowe’s is recognizing its private labels. These brands are made for the chain and usually cost less than the big national names while covering the same categories. You will spot them across tools, hardware, paint, and outdoor gear. When budget matters more than brand loyalty, they are often the practical pick.

    Ways to Save on Your Next Trip

    A few habits can shave real money off a project. None of them require a special membership, and most take only a minute to set up.

    • Watch for seasonal sales around holidays, when appliances and tools drop in price
    • Check the clearance sections at the ends of aisles for open-box and discontinued deals
    • Ask about the current military discount if you qualify
    • Compare the store brand against the national brand before you commit
    • Use price matching when you find the same item cheaper elsewhere

    Simple Tips Before You Shop

    A little planning goes a long way inside a store this size. Measure your space twice before buying flooring or cabinets, since returns on cut or special-order items can be a hassle. Take photos of the parts you are replacing so an associate can match them. And if a project feels beyond your skill level, ask about installation before you leave, rather than buying first and scrambling for help later.

    Technology Is Changing the In-Store Experience

    Lowe’s has spent heavily to modernize how people shop, and the effort shows on the floor. The company introduced a generative AI shopping assistant designed to help customers plan projects, answer product questions, and track down items inside a store. For a first-time renovator standing in an unfamiliar aisle, that kind of guidance takes some of the guesswork out of a project.

    Behind the scenes, the chain has leaned into supply chain automation and smarter inventory tracking. The practical result for shoppers is better stock accuracy, so the website is more likely to tell you the truth about whether an item is actually sitting on the shelf at your local store. That reliability is a small thing that saves a wasted trip.

    The broader push, which leadership calls the Total Home strategy, is about serving a customer through an entire project rather than a single purchase. Someone remodeling a bathroom is nudged toward the vanity, the flooring, the lighting, and the install, all under one roof.

    Shopping Online vs In the Store

    Both channels have their place, and the smart move is often a blend of the two. The website is ideal for research, price comparison, and checking availability before you drive over. Heavy or bulky items like appliances and lumber can be ordered online with delivery, which spares you the struggle of wrestling them into a car.

    The store still wins for anything you want to see, touch, or match in person. Paint colors, cabinet finishes, and flooring samples are hard to judge from a screen. Picking up online orders in store is also handy, since it locks in your item while skipping the shipping wait.

    A note on returns

    Return policies are generally friendly, but they are not unlimited. Standard purchases can usually be returned within a set window with a receipt, while special-order and cut items such as custom blinds or trimmed lumber are far harder to send back. Reading the policy before buying a made-to-order product saves headaches down the line.

    Frequently Asked Questions

    Is Lowe’s cheaper than Home Depot?

    Prices are usually very close, and neither store is reliably cheaper across the board. The better deal depends on the exact item, current promotions, and whether a store brand version exists.

    Does Lowe’s install what it sells?

    Yes, for many categories. Installation is handled through independent contractors, and it can be arranged for flooring, appliances, windows, doors, and similar products.

    Is Lowe’s a franchise?

    No. Every Lowe’s store is owned and operated by the company. There are no franchised or licensed locations.

    Where is Lowe’s headquartered?

    The corporate headquarters is in Mooresville, North Carolina.

    Who runs Lowe’s?

    Marvin Ellison serves as Chairman, President, and Chief Executive Officer.